WordPress powers nearly half the web — and if your site is one of them, adding an AI chatbot takes about five minutes. With Easy-Peasy.AI Bots and the free official WordPress plugin, your site gets a chat widget that answers visitor questions instantly, 24/7, trained on your own content. Install the plugin, paste your Bot ID, done — no code, no theme editing.
What Is the WordPress AI Chatbot Integration?
It’s a floating chat widget powered by an AI agent you train on your website, documents, and FAQs. Visitors click the bubble in the corner of any page, ask a question, and get an answer in seconds — in your brand’s voice, from your actual content. The official plugin handles the embedding for you, so setup is a settings field rather than a code snippet.
Why Add an AI Chatbot to WordPress?
- Answer visitors before they leave. Questions that wait for a contact-form reply usually never get asked twice.
- Trained on your site. Feed it your pages and docs — answers are about your business, not generic chatter.
- Capture leads around the clock. The bot can collect names and emails from interested visitors while you sleep.
- Five-minute setup. The plugin does the embedding; you only paste one ID.
What You’ll Need
- An Easy-Peasy.AI account (free to start) with a bot created and trained on your content
- A WordPress site where you can install plugins — any self-hosted WordPress site, or a WordPress.com site on a plan that allows plugins
Method 1: The Official Plugin (Recommended)
Step 1: Pick the bot you want on your site
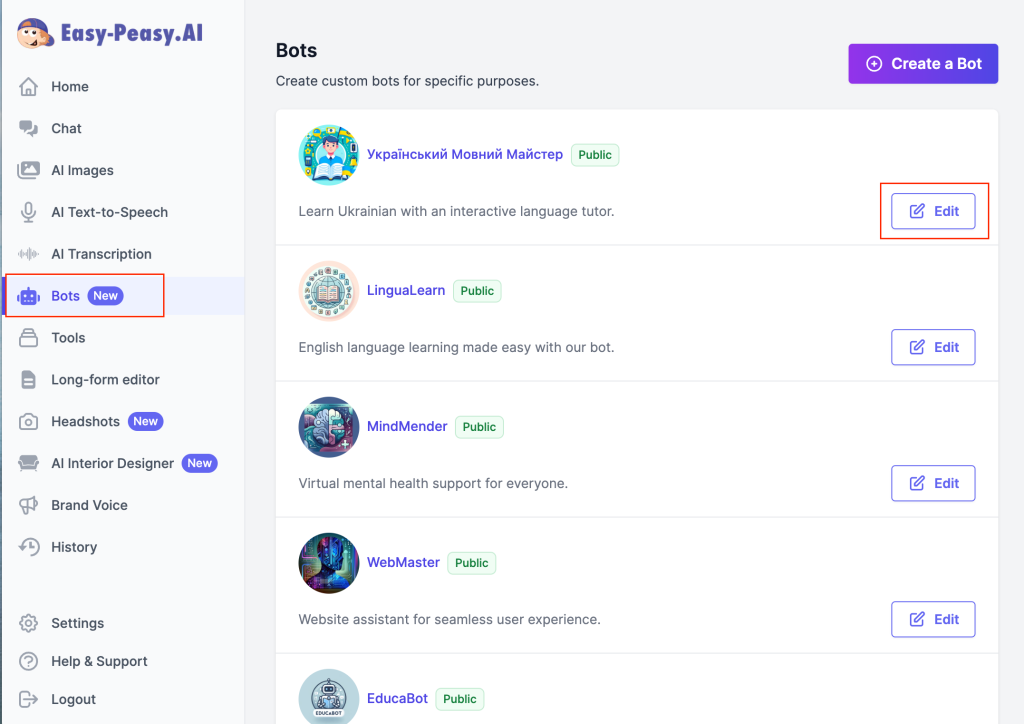
Sign in to Easy-Peasy.AI — if you don’t have an account yet, create one for free. Open the Bots page and select the bot you’d like to add to your WordPress website. If you haven’t built one yet, create it and add your website URL or documents as knowledge first.
Step 2: Open Plugins in your WordPress admin
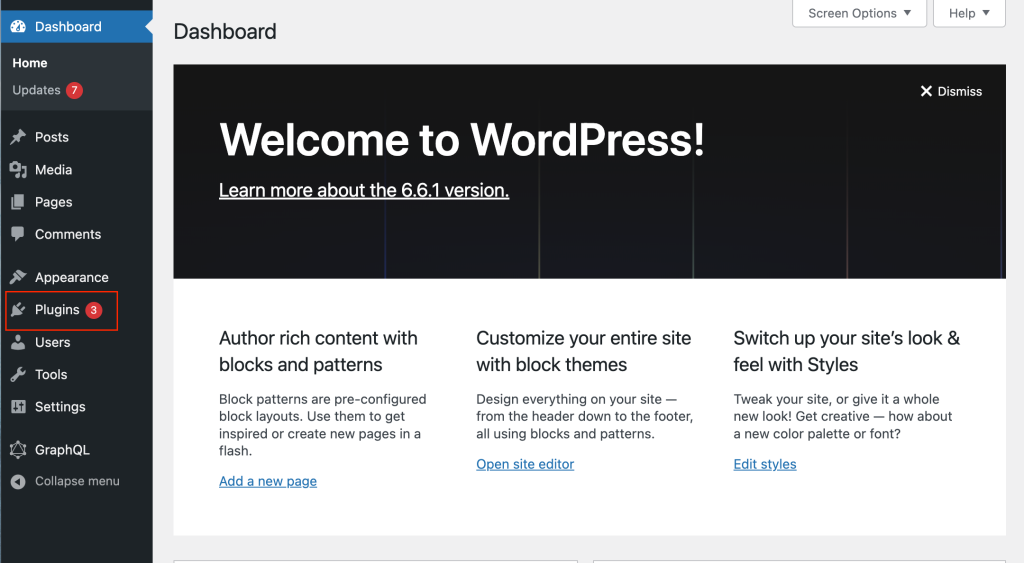
In your WordPress admin dashboard, click Plugins in the left sidebar.
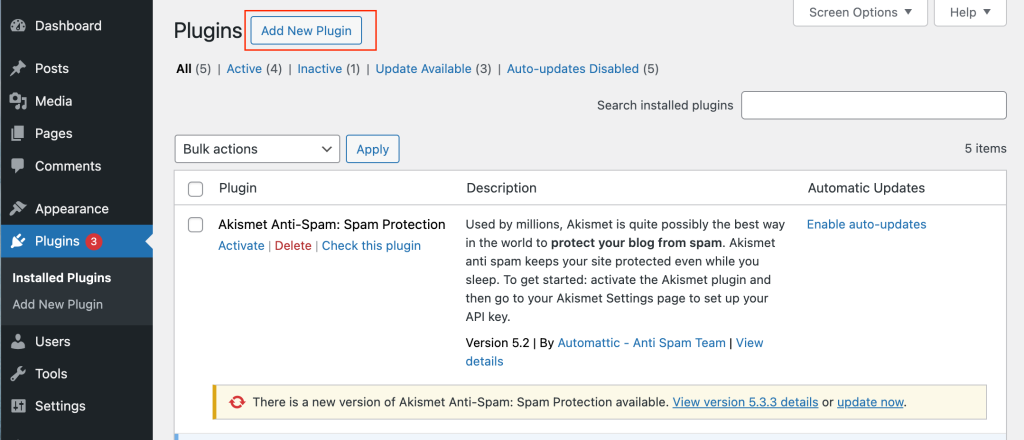
Click Add New at the top of the page.
Step 3: Install and activate the Easy-Peasy.AI plugin
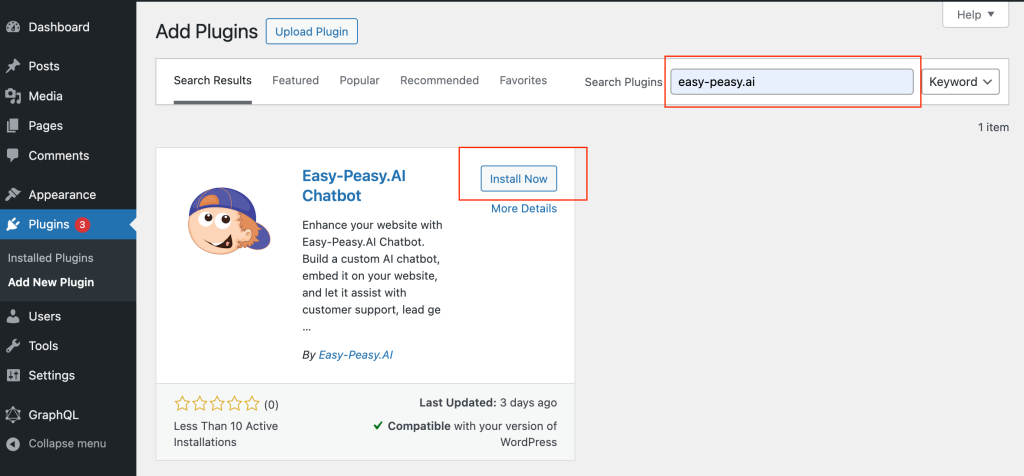
In the search bar, type Easy-Peasy.AI. Find the Easy-Peasy.AI WordPress plugin, click Install Now, and then Activate.
Step 4: Open the plugin settings
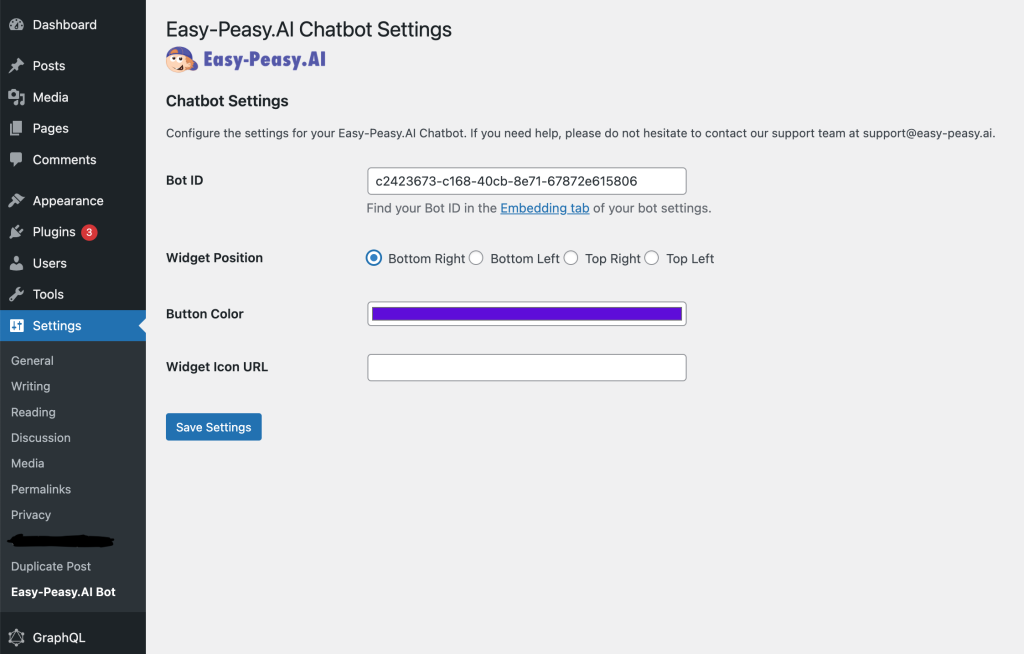
In the left sidebar, click Settings and look for Easy-Peasy.AI Bot. The settings page has a single text box labeled Bot ID — that’s all the plugin needs.
Step 5: Copy your Bot ID
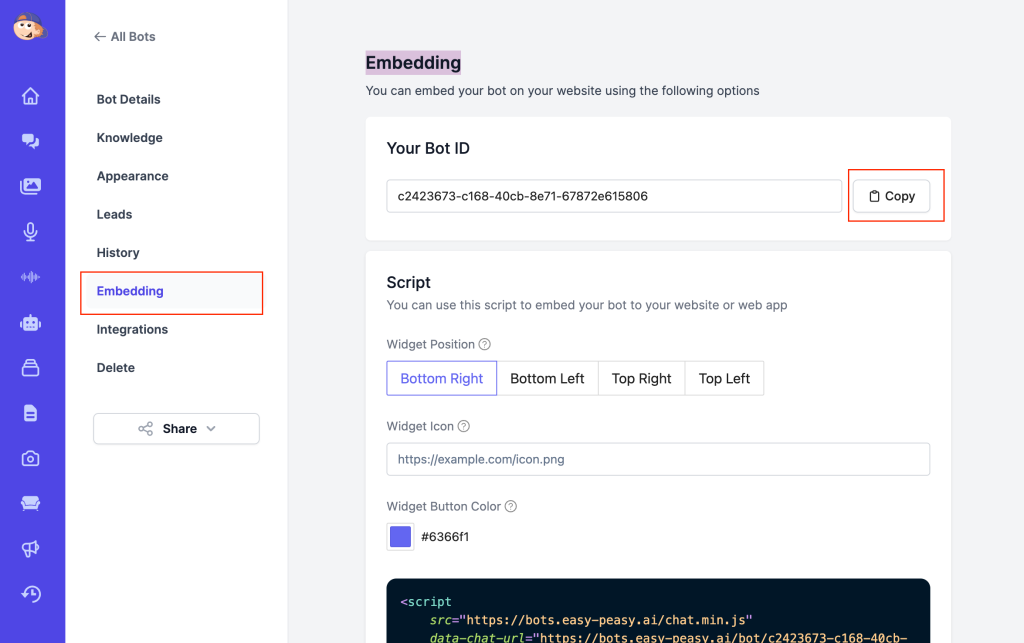
Back in Easy-Peasy.AI, open your bot and click Embedding in the sidebar. Your Bot ID is at the top of the page — copy it.
Step 6: Paste, save, and you’re live
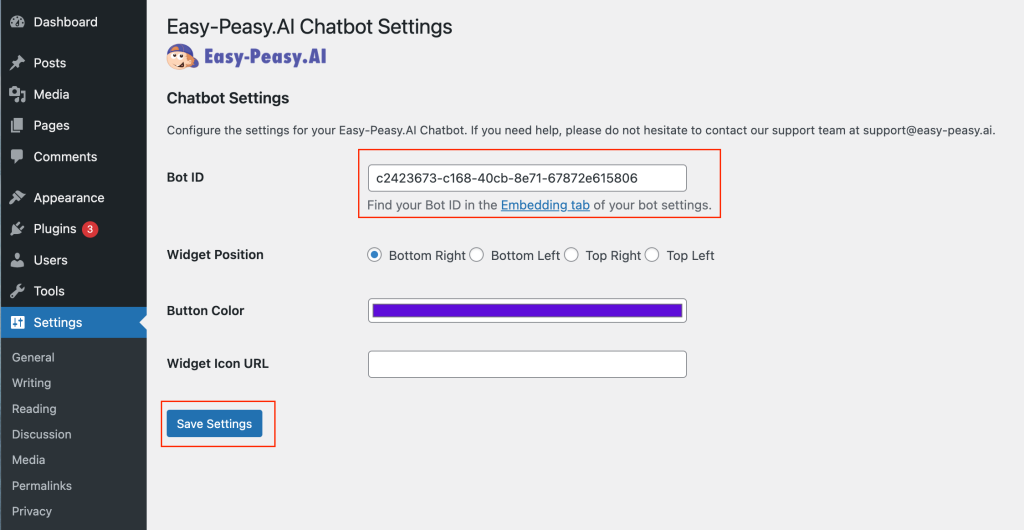
Paste the Bot ID into the text box in your WordPress settings and click Save Changes.
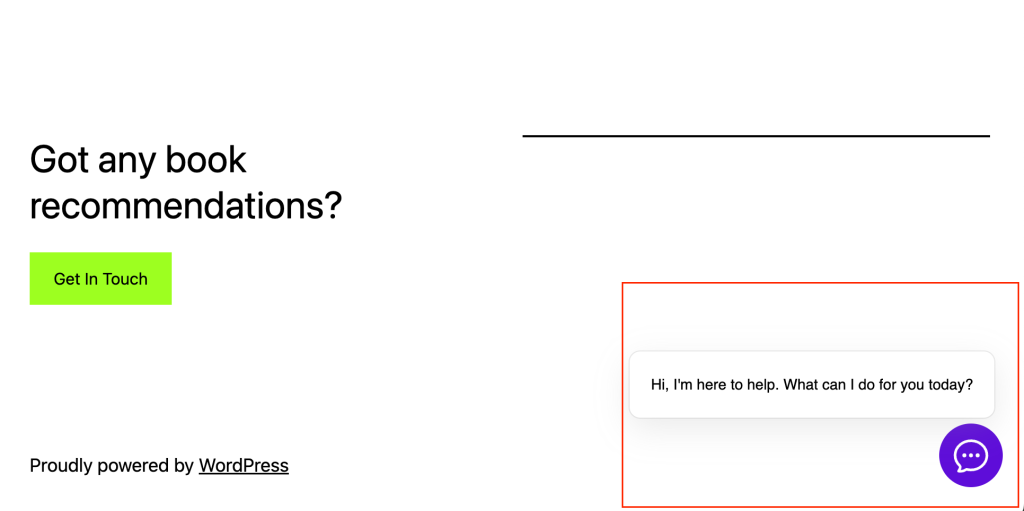
Open your site — the chat bubble is now in the corner of every page, ready to answer questions from your knowledge base.
Method 2: Paste the Script Yourself (No Plugin)
Prefer not to add another plugin, or working on a site where you manage code directly? Grab the widget script from your bot’s Embedding page (it also lets you customize the position, size, and brand color) and add it before the closing </body> tag — via your theme’s footer.php, a code-snippets plugin, or your page builder’s custom-code area. The result is identical to the plugin.
Method 3: Inline Chat With a Custom HTML Block
For a dedicated support page, embed the full chat window inline: add a Custom HTML block in the editor and paste your bot’s iframe snippet from the Embedding page:
<iframe src="https://bots.easy-peasy.ai/bot/YOUR-BOT-ID?mode=embedded" width="100%" height="600" allow="microphone"></iframe>
Tips for a Great WordPress Chatbot
Train it on the pages people actually ask about
Pricing, shipping, services, booking — add those pages to the knowledge base first, and retrain when they change.
Match your theme
On the Embedding page you can set the widget’s button color and position so it blends with your theme instead of clashing with it.
Give it an escalation path
Add an instruction like “If you can’t answer, point the visitor to the contact form.” A graceful hand-off beats a wrong answer.
Check your other channels
The same bot can also answer on email, WhatsApp, Messenger, Telegram, and even phone calls.
Frequently Asked Questions
Is the WordPress plugin free?
Yes — the plugin is free, and you can start with a free Easy-Peasy.AI account. Conversations count toward your plan’s usage.
Does it work on WordPress.com?
Yes, on WordPress.com plans that allow plugin installation. On plans without plugins, use Method 3 — the Custom HTML block with the iframe.
Will the chatbot slow down my site?
No — the widget script loads deferred, after your page has rendered, so your Core Web Vitals stay intact.
Does the widget appear on every page?
Yes — the plugin adds it site-wide. For specific pages only, use Method 2 with your page builder’s per-page code options, or Method 3 inline.
How do I remove it?
Deactivate the plugin (or clear the Bot ID field and save) — the widget disappears immediately.
Can I change how the bot looks and answers?
Yes — appearance, welcome message, and avatar are on your bot’s Appearance page; knowledge and instructions on the Knowledge and Bot Details pages. Changes go live without touching WordPress.
Give Your WordPress Site an AI Assistant Today
One plugin, one ID, five minutes. Create your AI agent, install the Easy-Peasy.AI plugin, paste your Bot ID — and every visitor gets an instant answer from a bot that actually knows your business.